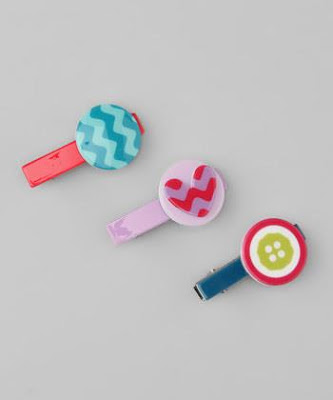
Review With Via Cacao


I am SO excited to share a wonderful new company with you that I know you ladies are going to LOVE! Via Cacao creates beautiful bows and hair accessories. They use 100% USA Designer fabrics. I am SO in love with all their beautiful designs and fabrics!

They sent us a couple of fun and beautiful bows to review for them.


I absolutely LOVE these bows! They are so unique and much different than the typical bows you find for sale. My co-blogger, Bridget and her little girl were able to review these for us.

"Hi! My name is Bridget, and I have a 1 year old daughter named Maci. I recently had the opportunity to review hairbows from Via Cacao. I had a great time reviewing these bows and showing them off on my little girl! I received a few soft bows and a couple hard bows. The soft bows were perfect for my little angel, and they have an alligator clip on the back so they can be clipped straight in their hair OR on a headband. I live the colors too, the two that I received are tan, kind of vintage colored, which you don't see a lot of in the stores!! The hard bows I received were perfect for my 3 year old niece! She loved that they were easy to put in, so she could do it herself, and the fact that they were lightweight so that she couldn't really feel them in her hair. We also loved the color of those as well!! Thank you so much, Via Cacao, for allowing us to review your bows! We love them!!!"


Look how adorable! They have lots of different styles to choose from on their website.


Here are just a few of my favorites!


Be sure to check out  more of their adorable accessories on Facebook & their Website


DIY Fabric Flowers


I just absolutely LOVE the fun little DIY projects that pop up in my inbox from DIY blogger, Emily. 
She's so crafty and creative! I love to make things like this and its always a big help with these little tutorials!


This is what I used:
Fabric--lace and sheer champagne
Scissors
Quilting thread (more dense and durable in my opinion)
Needle

Step 1:
Cut Fabric.
For my base piece, I used the lace because it was more sturdy. I cut it about 4x4 (which will end up about a 3 1/2 inch flower). Each layer afterward about 1/2 inch smaller, rotating fabrics.
About 6 layers was all I needed.


Step 2:
Make petals.
Fold the squares (the same way you would fold paper to make a snowflake:))---half, half again, then once more diagonally.
You should end up with something like-

Cut the end to be round and even.


Step 3:
Layer.
Align the pieces of fabric in larger to smaller order.

Step 4:
Stitch.
Sew a small stitch into the middle of the flower to hold pieces together then fold in half.
Sew several stitches into the fold to bring the flower together.

In this part of the project, you will need to see what looks best for your flower, fold the middle in different and complementing directions and make stitches accordingly. I find that pinching different areas and then stitching what looks right works the best.
This step should bring the petals together and give the flat flower depth and life.

Turn your flower over and fluff!

                         That's it! Enjoy! xoxo-M